
Soybeans - A View Through the Newest Technology
Virtual Reality in the Classroom
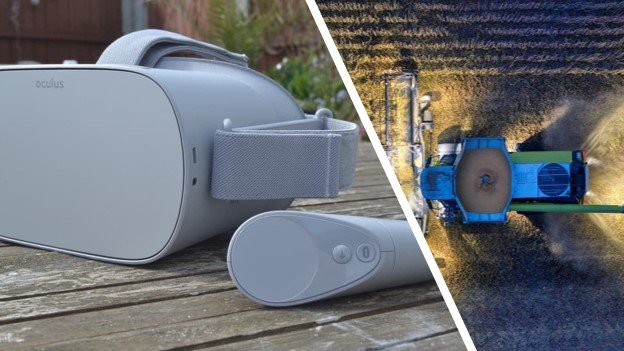
We expanded the VR Program from events to a set of VR units for a classroom or to use at a workshop in one big immersion experience. We have learned important things about our Oculus units since we expanded their use. We hope your 360 Virtual Reality Experience is fun and educational.
No Wi-Fi/Internet/Router is needed to access the Oklahoma Soybean Board’s selection of videos.
Watch for updates here to:
“Schedule Virtual Reality Headsets For Your Classroom”
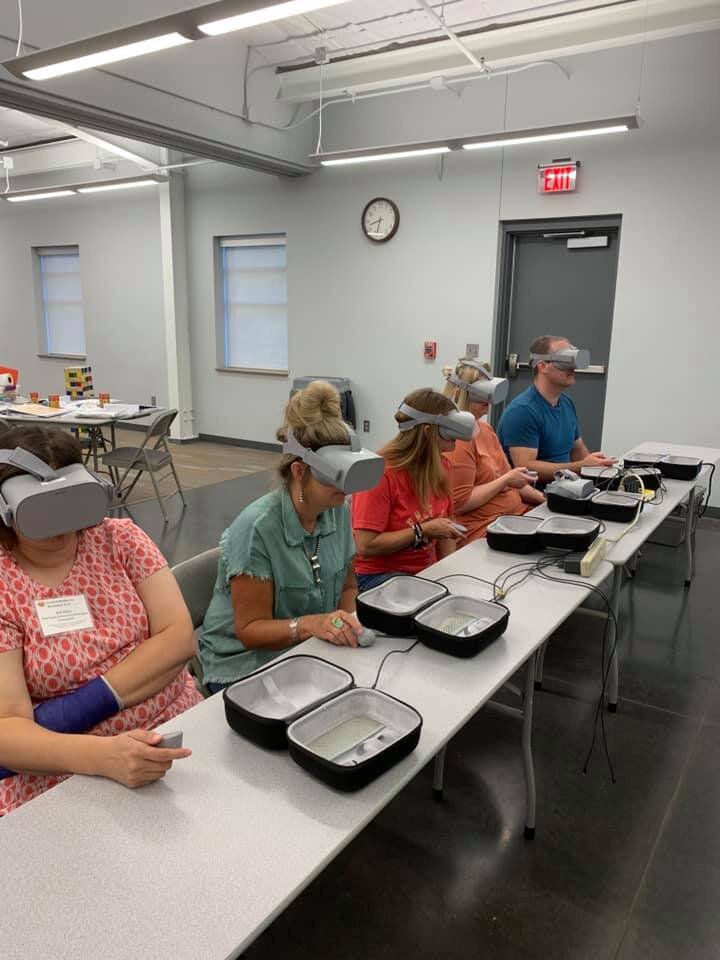
Before you put on the headset there are a few things that will help you have a great experience.
-
The VR Headset and Controller have the same number
The VR Headset and the Controller are Paired together. The number at the end of or on the controller and the number on the VR Headset under the strap must match.
Battery in the Controller
Put your battery in your controller and watch for the white light on top and front of your controller. The controller has a BACK button, and Oculus button and a trigger to choose menu and videos.
Button Reference Points
Look at the top of your VR Headset for your BUTTON REFERENCE POINTS.
Tighten the straps
Place the VR Headset on your head and tighten the 2 side straps and the over the head strap. This gives you the best fit and the least light for the best view.
Press the ON/OFF Button for 3-4 seconds
Press ON/OFF Button the middle of the top on the VR Headset for 3-4 seconds to turn on the VR Unit. Give it time to completely load. You will know you are ready when you can see the Red Sea around you and a few boxes with choices in front of you.
NO Wi-Fi Needed and Please Do Not Change
IMPORTANT NOTE: The VR UNITS will have a screen that say, “NO Wi-Fi”. Please do not change this setting. Setting up Wi-Fi causes issues for the next user at a different location since it will continue to look for the previous network. It is not like your phone; it wants to have a HOME BASE to look for and will not easily stop searching for that Wi-Fi. Thank you for not changing this setting. It should remain NO Wi-Fi.
Orient Yourself so that you stay safe during use
Use this time to orient yourself BEFORE making any choices. Put your feet flat on the floor in front of you. Make sure you know where you are at your desk or table. Do no stand up.
Your Controller is how you move around
Put your Controller in your right hand. You will use your Oculus button to orient your face to the screen so that the menus are in front of you. The Trigger is for making menu and video choices. The Back button will help get you back so you can make a different choice.
Go To Library/Oculus Gallery/Internal Storage
Once in the VR choose Library/Oculus Gallery/Internal Storage since no Wi-Fi is needed.
Do a complete Power Shut Down
Press the ON/OFF Button for 10 seconds to turn off the unit and then use the controller to choose POWER DOWN.
-
What should I do first?
Technology is fun, can be simple but will often become complicated.
If there are any issues with the VR Headset or the Controller, please try to correct the issue by the following 3 steps:
#1. Hold down the ON/OFF Button for 20 seconds and with the headset on choose Power Off with your Controller. Leave it off for 20 seconds and hold down the ON/OFF Button for 4 seconds to turn it back on.
#2. If tip #1, does not reset your VR Unit, with the head set on press the Down Volume Button and the ON/OFF Button at the same time. When the system menu comes up, use the Down Volume Button to move to the Exit and Reboot the Device prompt. Use the ON/OFF Button to select Exit and Reboot
#3. Choose another VR Headset and Controller or wait for another unit.
-
The following solutions of A, B, or C are possible by the user. Solutions which will need intervention of D and E will be handled when the VR Headset and Controller are returned to the Oklahoma Soybean Board Office.
3 Flashing Dots
I. Why does my unit have “3 flashing dots”? It could be one of a few things but now we have the solutions. They are listed below in the order of probability since A and B cause the issue bur can be cleared, C can resolve the issues and D is a RESET measure, so we have steps in place to mitigate and resolve the issues.
A. ISSUE – Buffering to contact the Wi-Fi
The unit encounters a buffering issue while looking for the Wi-Fi it is set to see. When the unit gets changed to look at the Wi-Fi in a particular location, by the admin to add updates or do maintenance or a savvy user and then changes location, it will look for its ‘home’ or ‘new home’ internet. It is not like your phone that tells you what other Wi-Fi is available for use. In other words, if the Wi-Fi is ON, it doesn’t look for options, it looks for what it knows as ‘home’.
1. SOLUTION – While wearing the VR Headset, press the Down Volume Button and the ON/OFF Button at the same time. When the system menu comes up, use the Down Volume Button to move to the Exit and Reboot the Device prompt. Use the ON/OFF Button to select Exit and Reboot the Device.
a. Maintenance - All units are confirmed and/or changed to confirm that they are set and check that Wi-Fi is OFF.
b. Classroom/Workshop - We added information about Wi-Fi to our new “Video on How to Use the VR Unit”. It leaves our environment with Wi-Fi OFF and we let the user know there is no reason to turn the Wi-Fi ON. It is still possible to change it to look for a Wi-Fi so we educate them as to why this is NOT preferable and why it will cause an issue on their viewing experience.
B. ISSUE – Power Level is too low to load the operating system on the VR Headset
Our units are charged before going to an event, classroom, or workshop. They are unplugged, zipped into their bag, and taken to their location. The power system is sent with them if they are staying in a location for more than one day. The assumption by Oculus on how you are using a VR unit is that you are unplugging them from the recharge power source and putting them on to use or continuing to use them. We discovered that when they were unplugged from the power source during their recharge, the VR Headsets are not actually off, they are asleep. This was draining them down. What we presumed to be at 95%-100% battery when they were zipped and ready to go was slowly being used up waiting for the user to put the headset on.
1. SOLUTION – While wearing the VR Headset, press the Down Volume Button and the ON/OFF Button at the same time. When the system menu comes up, use the Down Volume Button to move to the Power OFF prompt. Use the ON/OFF Button to select Power OFF. Plug in the VR Headset Unit to a power source and wait until the light on the top turns from amber/yellow to green. Unplug the unit and place it on your head. Follow the prompts to bring the VR set up.
a. Maintenance – Unplug from the power source, and do a Headset Shut Down before zipping them into their bags for transport.
b. Classroom/Workshop - We added a Power Shut Down instruction to our new ‘Video on How to Use the VR Unit’ on the website so that the user will power it down if they are having this issue.
C. ISSUES – Lens Light Overload
When a VR Unit is taken off and laid down on the table before it is Powered Down correctly, it tries to protect itself from the damage of light on the lens.
1. SOLUTION – Cover the Light Lens inside the VR Headset and Press the ON/OFF while wearing the VR Headset. If this does not restart the VR Headset, press the Down Volume Button and the ON/OFF Button at the same time. When the system menu comes up, use the Down Volume Button to move to the Exit and Reboot the Device prompt. Use the ON/OFF Button to select Exit and Reboot
a. Maintenance – If the VRs are at an event where users are putting the headset on and then taking them off and laying them down, this could be the resolution. Place a finger inside the VR to cover the small lens between the 2 eye lenses and press the ON/OFF Button for a few seconds.
b. Classroom/Workshop - We added education to always Power Shut Down the VR Headset to our new ‘Video on How to Use the VR Unit’ on the website so that the user will power it down correctly for the next user or if they have it several days, they will be aware of this specific ‘light sensitivity’ trait, or the need to Power it Down before leaving the VR Unit.
D. ISSUE – Needs to be Refreshed and Paired to the APP
It is necessary at times to re-establish the VR Headset’s link to the APP.
1. SOLUTION – Open the Oculus APP on your phone. Log into the account and follow the directions to Pair the Device.
a. Maintenance - Added a Quarterly step in our maintenance to PAIR it back to the APP. This does not change any settings or access. It gives the unit a refresh in case it is encountering a bad vector or some other type of corrupt data.
E. ISSUE – Factory Reset if all other methods have failed
1. SOLUTION - If problem persists then do a FACTORY RESET
This does erase the data and you must Set Up the VR with the APP and Reload the APP and Selected Video again.
a. Hold down the down volume and the ON/OFF button at the same time to get to the system menu
b. Use the down volume button to select the Factory Reset. Use the ON/OFF button to Select – Factory Reset and wait while the information on the unit is erased
c. Use the cell phone and Oculus App and follow the step to Set Up Your Oculus
d. Set the Virtual Environment to RED SEA for consistency among the VR Units and to use as an orientation tool for the user
e. Download the APP – Oculus Gallery
f. Plug the USB into the computer and the VR Unit and follow the directions on the VR Unit to ALLOW the PC to copy the Video Selections to the Unit drive
g. Put the VR headset on and check the Library/Oculus Gallery/Internal Storage path to see the videos
h. Make sure the videos are set to 2D or 360 or 360 3D depending on their format which will give the best viewing experience. The file format may already be added to the name of the file with an _360_LR or _360_TB or just _360
i. Settings/See All Wi-Fi OFF
j. Power Down the VR Unit by holding the ON/OFF button several seconds and using the controller to POWER OFF.